**If you are looking for the 2016 Discounted Group Food Storage Order, click here.
HOW TO MAKE BREAD with INSTANT YEAST
One of the most popular links on this blog is a product review and post about how to make
While I admit that was my original go to recipe for any bread when I first started out, I rarely go that route these days. My favorite sandwich bread recipe for the past several years has definitely been this Honey Whole Wheat Recipe.
(You can view all of my recipes - for bread or anything else - by clicking on the recipe tab at the top of this page).
It has been a long time favorite at our house, as well as one of my 4 essential recipes for the food storage beginner.
And because one of the most common fears I hear from people is "making bread seems so intimidating! I don't know where to start, or how to do it!", I figured it was well over time to do a tutorial on how to make bread. I will be demonstrating with the honey whole wheat recipe above, but if you have a great family recipe that you love, but have always been scared of making your own at home, this post is still for you! There are some tried and true tricks to bread making that you can take away from this post and adapt it to any recipe that you make.
But first, lets start with the ingredients:
 |
| Saf-Instant Yeast |
 |
| Vital Wheat Gluten |
Honey Whole Wheat Bread
Saf-Instant Yeast
Freshly ground whole wheat flour
Vital Wheat Gluten
Water
Salt
Lemon Juice
Honey
Oil
 The ingredients you use are important!
  Not all yeasts are the same! Instant yeast cuts down on a 2nd rise time, as well as the need to proof (more info below), and although you can use any brand of instant yeast, I prefer Saf. You can get it at your local grocery store, or on amazon.
Vital wheat gluten can be found at several grocery stores, but if you are having trouble, look here:
Also, be sure that your wheat is fresh! (You can read more about the importance of that here).
And now, the recipe:
Honey Whole Wheat Bread:
makes 2 loaves
3 1/3 c. whole wheat flour
1/3 c. vital wheat gluten
1 Tbsp. + 1 tsp. instant yeast
2 1/2 c. hot tap water
1 Tbsp. salt
1/3 c. oil
1/3 c. honey (or 1/2 c. sugar)
1 Tbsp. + 1 tsp. lemon juice
2 1/2 c. whole wheat flour (or 3 c. all-purpose)
Directions:
Combine wheat flour, vital wheat gluten, instant yeast and water until just mixed. Let sit for 10 minutes to 'sponge'. Add salt, oil, honey and lemon juice and mix well. Add remaining flour, 1 cup at a time, mixing well between each addition. Mix or knead for 10 minutes. Dump dough onto a greased surface, and form a ball. Cut in half, and form each half into a loaf. Place in two large greased loaf pans. Let rise until double, about 25-30 minutes. Bake at 350 degrees for 30 minutes.
Now I will take you through the steps of making bread, and why they are important.

Combine a portion of the flour (3 1/3 cups), the vital wheat gluten, and the instant yeast in your mixing bowl.

Give it a stir.
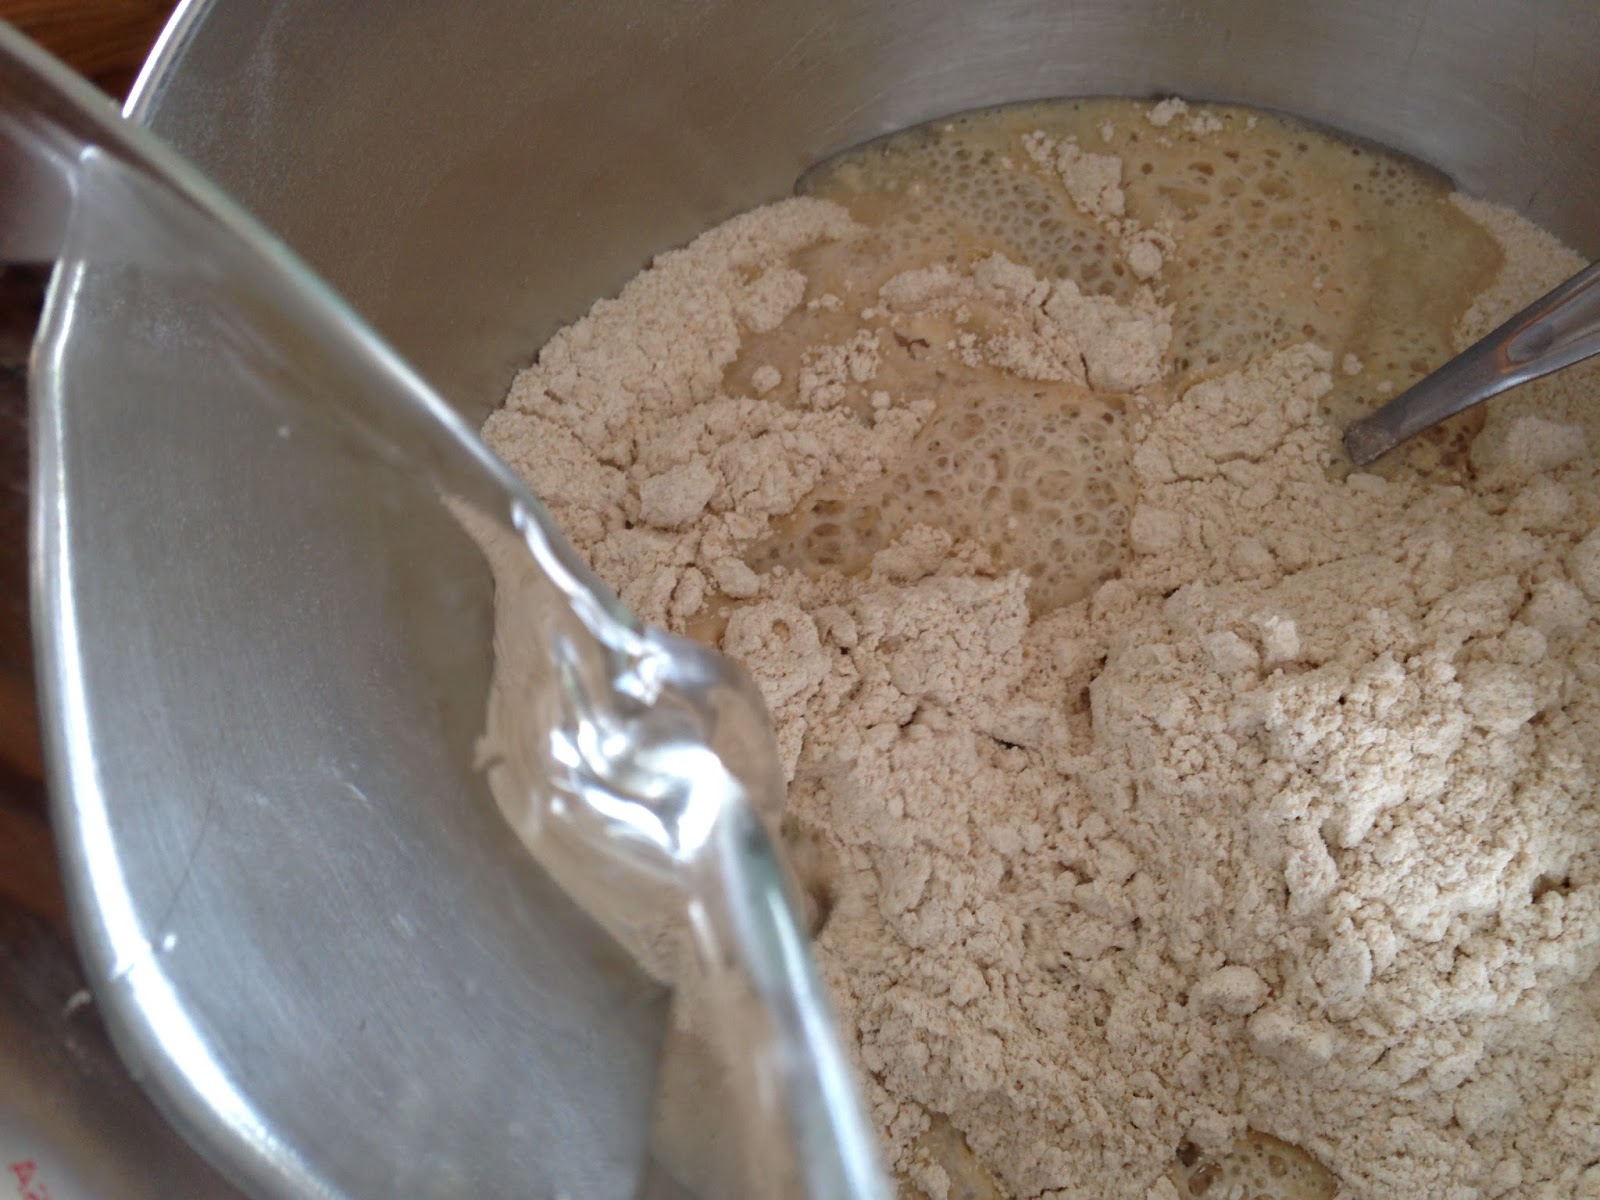
And add in the HOT water.
**Another benefit of instant yeast is that you can use hot water. You don't need to heat it up at all, just get it as hot as your tap can go.
Now, stir it up, until just moistened.

Sponge for 10 minutes. A sponge is just as it sounds: a bubbled mixture of flour, water and yeast.
**This is like the equivalent of proofing non-instant yeast. It allows the yeast and gluten to start activating. Sponge based breads tend not to go as stale as fast, keeps bread from drying out, and guarantees a decent rise.
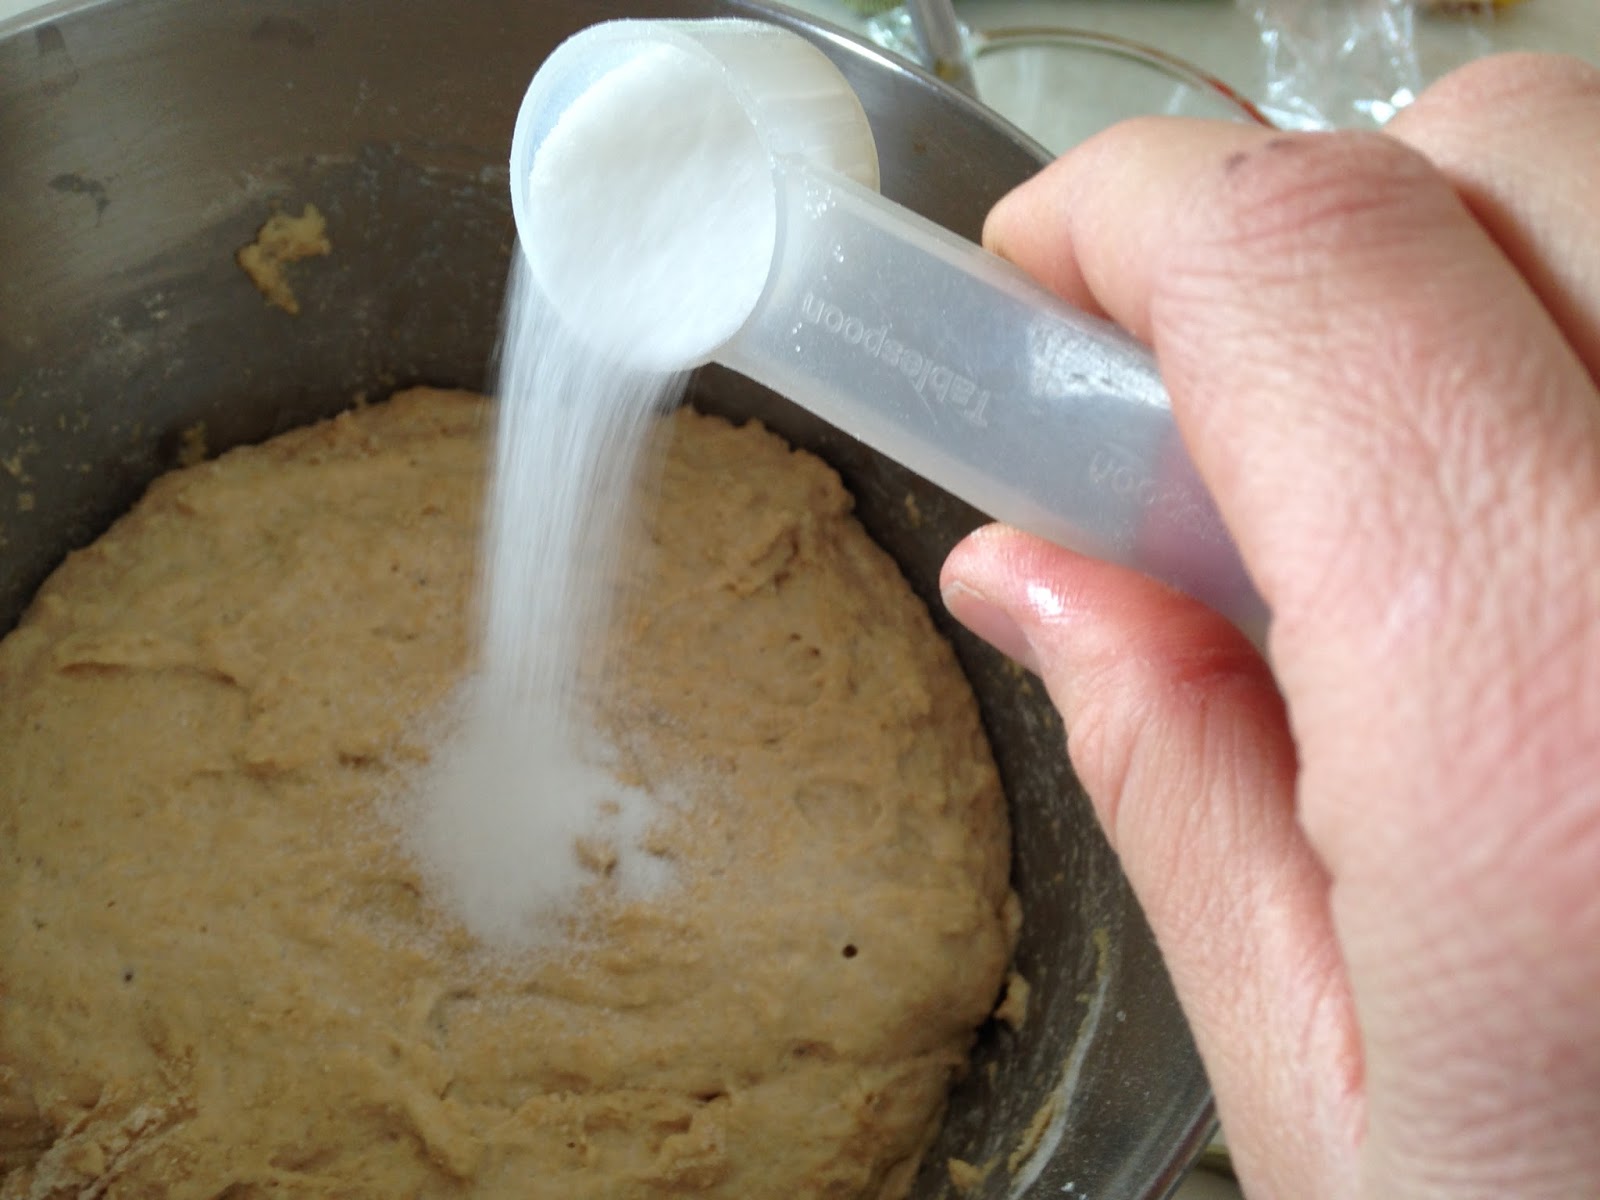
Bread that has been allowed to sponge should be lighter, and full of air bubbles ( causing it to rise). At this point, you can add in your remaining ingredients.
Salt

Lemon Juice
** you can also use vinegar. The acidity in the lemon juice actually acts as a form of preservation, making the bread last longer once it has been baked. You cannot taste this in the final product, and it can be left out if you are planning to eat the bread right away.

Honey
**Any sweetener can be used here as a substitute for honey, if desired.

And oil.
**I've tried making this bread with vegetable, canola, olive, and coconut oil. They all turn out great. You can use whatever oil you have on hand, though I prefer olive or coconut.

Once you've added the salt and wet ingredients, you'll want to start your mixer on the lowest setting.
**In general, the least amount of 'force' used to mix bread, the better. I always keep mine on the lowest setting possible, unless there is too much dough and a higher one is required for it to actually mix.


**On average, wheat flour should be mixed or kneaded for 10 minutes. White flour, on the other hand, only needs to be kneaded for 6 minutes. I have found that these times make the best bread.

**If you still have dough sticking to the sides of your bowl, you have not added enough flour. The perfect consistency of bread dough is when it naturally cleans the sides of the bowl.
Add 2 Tbsp. of flour at a time, until you reach the desired consistency.


Cut your dough ball in two equal halves.

** Cutting and separating can be "stressful" on dough. Allowing time for it to recoup will allow for easier rolling and shaping.
You can use this time to grease your loaf pans.


**I use large loaf pans, but you can also fit these into medium sized.

**Instant yeast works very quickly, and your bread will most likely be doubled in size by this point.

Bake in a 350 degree oven for 30 minutes.

 When finished baking, your bread should be golden brown on top, and will have risen dramatically while in the oven, as pictured here.
**If you are not sure that your bread is done, you can test it with a thermometer. Fully cooked bread will reach a temperature of 190 degrees F.


Remove bread from pans and let cool on a wire rack or wooden cutting board.
**I find with this bread that removing it from the pan immediately after baking results in the easiest separation from the pan. No need to let it rest first.

Once bread has been allowed to cool slightly, slice and serve!
Perfectly delicious sandwich bread, every time!
This bread easily lasts a week on the counter without getting dry or going bad. It will last even longer (probably 2 weeks), if kept in the refrigerator.
These loaves also freeze very well! Cut bread into slices, and store the entire loaf in a gallon ziplock freezer bag. Remove all air, and freeze for up to 2 months.
To defrost, take out of freezer, open bag and place a paper towel under the bread loaf (keep inside of the bag). Allow to thaw on the counter or in the fridge (the paper towel will absorb any ice crystals and prohibit soggy areas).
I hope this helps clear up any confusion or heartache about home made bread! Give this recipe a try, you definitely will not be disappointed!
No comments:
Post a Comment